Monday, February 24, 2014
ASS OVER TEA KETTLE union jack
We are well known for our rain here on the west coast. It usually
rains for a long time but its relatively light compared to other
places. Last night was a different story. All of a sudden it poured
like a mid summer Florida storm. I in the mean time was worried
about some items outside so I went to the top of the deck stairs and
started down. Well I made it to the bottom however I was no
longer on my feet. Yes I took a fall the moment my runner stepped
on the wet stair. My hip landed on the ground, but my rib and wrist
hit the concrete.
"GEORGE!!!!"
Well he came and got me back in the house and I was banished to
the bed for the rest of the night with ice.
My hip is bruised, thank god for that extra cheese cake,
my rib feels fine but my wrist is sore.
So today I had to come up with light duty work.
I also couldnt do my regular job because my PC is gone to Future Shop
to be scolded and straightened out, so here I sit getting familiar with Georges PC.
So today I decided to sit still, let my wrist heal and be a creative painter.

Its a beautiful serpentine dresser call *JACK*.
Hes not done but I am for the night.

I also manage to finish a pair of wooden pillar candle holders made in India.
I got them at a yard sale recently to paint and distressed. The
plan is to take them to the community show next week but youll
have to wait and see if I can give them up.


Here are the close ups of the accents I promised the other day
on the lingerie chest I finished. Let me know what you think.
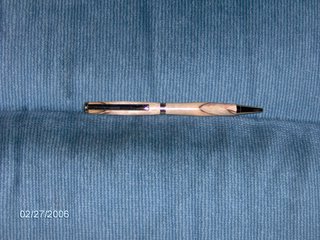
Ambrosia Maple Pen
Phil (on the mountaintop) from Western NC, an excellent and respected woodturner, sent me some of his cutoffs. Included in this was a piece of what he called "Ambrosia Maple." I think others refer to this look as "spalted."
The Ambrosia Maple will be good for a few pens. Here is the first one. It is intended to be for the wife of my neighbor. I made HIM a walnut pen earlier in the afternoon and did this one in the evening.
These are 3 pictures of the same pen.


Read More..
The Ambrosia Maple will be good for a few pens. Here is the first one. It is intended to be for the wife of my neighbor. I made HIM a walnut pen earlier in the afternoon and did this one in the evening.
These are 3 pictures of the same pen.


Sunday, February 23, 2014
MISS CHERRY PIE red buffet pt 2
Big Reds sister is completed.


Cherry has nice legs and a brighter glow than her stately brother.
Big Red was waxed and polished from head to toe,
were as Cherry was finished with wipe on poly.


She needed little repairs all over, but we all know
with age comes experience.

Miss Cherry has not traveled too far from home in all her years!

Here is a fresh raw coat of Emperors Silk Chalk Paint on her body.

and the finished coat that topped her off.


Both her doors got magnetic closures.

Her jewelry was pretty but to hang in the pub with all those rough and tumbles
she needed something new to help fit in better.

Shell be catching the eye of many and maybe even a whistle or two.

Cherry will go home to her decorators home for a short stay then she will be off
to her new digs in the Fort Pub.
VENEER repairing bubbles
Heres the third article of the much anticipated VENEER series.
The first article explained how to deal with edge gluing loose veneer
The second article detailed filling in missing areas of veneer on painted furniture.
This time I will show you how to get bubbled surface veneer glued back down.

For these repairs you will need 3 items,
your wood glue, a shape utility knife, and a heavy weight.

In most cases you can see where the veneer has bubbled/lifted but
running your hand over the surface will also help find areas you dont see.

You have to get the glue underneath your veneer somehow.
The next step is the scarey one.

Use your uility knife to cut a slice into the bubble.
Use a sharp knife, and cut in the direction the grain runs.

Apply your glue getting into the cut and under the bubble.

you can use air to blow it under the edges,
do what ever you can think of just be delicate with the edges of the cut veneer.

Wipe up any excess glue with a damp cloth.
Now weigh your repair down.
Below you can see I used a cast iron urn (heavy) on a flat board,
I even used a small bit of folded sandpaper right over the glued spot as a pressure point.

** MINI VENEER TIP **
Wax paper wont stick to glue.
It is a good buffering material to use
between your repair and any clamps or weights you use.
Saturday, February 22, 2014
Garden Tub Ideas
Bathroom Tub Ideas For Your Home – House Plans and More
Bathroom Tub Ideas For Your Home – House Plans and More

Corner Garden Tub and Whirlpool from Jacuzzi
Corner Garden Tub and Whirlpool from Jacuzzi

Read More..
Bathroom Tub Ideas For Your Home – House Plans and More
Corner Garden Tub and Whirlpool from Jacuzzi
Corner Garden Tub and Whirlpool from Jacuzzi
Friday, February 21, 2014
Book Review Lathe Fundamentals The Complete Gude
Good Evening Everyone,
There are a number of books on the market about wood lathes and one of the very best books for beginners is Lathe Fundamentals: The Complete Guide by Popular Mechanics/Rick Peters ( New York: Hearst Books, 2006. ISBN: 978-1-58816-447-6. 192 pages). Many of the books published about wood lathes tend to be written by experts for people who have been turning for a long time or their coverage of all the aspects of wood turning tend to be rather uneven. Lathe Fundamentals covers every aspect of wood turning-from selecting a lathe, the basic types of chisels, and basic techniques. It also goes into more advanced techniques, has a very clearly written section on chisel sharpening and grinding, and an excellent section on lathe maintenance and repair. At the very end of the book are several projects that will help the beginning turner achieve a simple but well made project-it even has a section on pen turning. The book is also is well illustrated with numerous photographs that show step by step how to achieve a given activity. Its very clearly written with a noticeable absence of technical jargon, which I think at times can be a little confusing for the beginning turner.
If you are planning to purchase a lathe and get started as a wood turner, this book is the book you should read before making a purchase. If you plan on purchasing a lathe for someone as a gift, then you should definitely purchase this book.
VW
Read More..
There are a number of books on the market about wood lathes and one of the very best books for beginners is Lathe Fundamentals: The Complete Guide by Popular Mechanics/Rick Peters ( New York: Hearst Books, 2006. ISBN: 978-1-58816-447-6. 192 pages). Many of the books published about wood lathes tend to be written by experts for people who have been turning for a long time or their coverage of all the aspects of wood turning tend to be rather uneven. Lathe Fundamentals covers every aspect of wood turning-from selecting a lathe, the basic types of chisels, and basic techniques. It also goes into more advanced techniques, has a very clearly written section on chisel sharpening and grinding, and an excellent section on lathe maintenance and repair. At the very end of the book are several projects that will help the beginning turner achieve a simple but well made project-it even has a section on pen turning. The book is also is well illustrated with numerous photographs that show step by step how to achieve a given activity. Its very clearly written with a noticeable absence of technical jargon, which I think at times can be a little confusing for the beginning turner.
If you are planning to purchase a lathe and get started as a wood turner, this book is the book you should read before making a purchase. If you plan on purchasing a lathe for someone as a gift, then you should definitely purchase this book.
VW
Best Wood Working Project Rules
Wood working is one of the most rewarding hobbies that a person can be
involved in. The reason most people fail or give up on woodworking
projects is that they get frustrated.
The two golden rules for wood working are:
Measure Twice, Cut Once
Obviously you don’t want to waste the time and money making incorrect
cuts or running back and forth to the hardware store twenty times!
This is actually an easy step once you get in the mindset and take
your time before putting the saw to the wood!
Have A Plan
Without some woodworking projects plans your project will to go
on..and on..and on. If you actually even “finish” the project you end
up with a wobbly table or a crooked shelf.
Obviously not all of us have the skill or background to draw up plans
on our own. So this usually meant the frustrating process of going to
bookstores and hardware stores in search of the prefect plan for your
project.
The good news is now with the internet this has changed! With a few
mouse clicks you can have thousands of wood working project plans for
everything imaginable. Of course this doesn’t solve all your
problems. Too often an internet search for woodworking plans leads
you to a site that charges you $10 or more for one plan… a plan they
often advertise as free!
So I was excited to come across a huge database of over 14,000 wood
working project plans! The plans are extensive and include projects
for beginners and for experienced wood workers. Step by Step plans
ranging from sheds and chairs to bird houses and planters.
This has worked out so well for me (a very inexperienced wood worker
just a year ago)
that I am now contemplating my first big project. I’ve used the plans
for small projects like shelf’s and making some containers for my wife.
Now I’m looking at making a desk. Which I never would have attempted
just a few months ago, but now that I have a suitable plan I’m headed
to the hardware store to get the supplies I need.
Check back soon and I will show pictures of my progress on my new
computer desk. If all goes well this summer I might build the shed
out back that I have alchoices wanted but never got due to the high cost
of buying one from Lowes or Home Depot.
Read More..
involved in. The reason most people fail or give up on woodworking
projects is that they get frustrated.
The two golden rules for wood working are:
Measure Twice, Cut Once
Obviously you don’t want to waste the time and money making incorrect
cuts or running back and forth to the hardware store twenty times!
This is actually an easy step once you get in the mindset and take
your time before putting the saw to the wood!
Have A Plan
Without some woodworking projects plans your project will to go
on..and on..and on. If you actually even “finish” the project you end
up with a wobbly table or a crooked shelf.
Obviously not all of us have the skill or background to draw up plans
on our own. So this usually meant the frustrating process of going to
bookstores and hardware stores in search of the prefect plan for your
project.
The good news is now with the internet this has changed! With a few
mouse clicks you can have thousands of wood working project plans for
everything imaginable. Of course this doesn’t solve all your
problems. Too often an internet search for woodworking plans leads
you to a site that charges you $10 or more for one plan… a plan they
often advertise as free!
So I was excited to come across a huge database of over 14,000 wood
working project plans! The plans are extensive and include projects
for beginners and for experienced wood workers. Step by Step plans
ranging from sheds and chairs to bird houses and planters.
This has worked out so well for me (a very inexperienced wood worker
just a year ago)
that I am now contemplating my first big project. I’ve used the plans
for small projects like shelf’s and making some containers for my wife.
Now I’m looking at making a desk. Which I never would have attempted
just a few months ago, but now that I have a suitable plan I’m headed
to the hardware store to get the supplies I need.
Check back soon and I will show pictures of my progress on my new
computer desk. If all goes well this summer I might build the shed
out back that I have alchoices wanted but never got due to the high cost
of buying one from Lowes or Home Depot.
Coat Closet Revisited

Free woodworking plans for a deep coat closet. Includes ample shoe storage and a bench seat.

My coat closet is located in front of my stairs which makes it deeper than a typical reach-in closet which makes it a little difficult to plan an efficient layout. I decided to use some of that extra depth to include a bench in the coat closet. It will turn the front coat closet into a small mudroom type closet. It wont be like the other closet to mudroom conversions that are open, this closet will still have a door that can close but still provide the necessary functionality.

The current amount of hanging space is sufficient so the new design will have about the same amount of hanging space for coats with both double hang and single hang poles for larger coats. Shoe storage will be greatly increased by adding 5 18"shoe shelves which should be able to hold 2 pairs of mens shoes or 3 pairs of womens shoes each. Additionally, taller shoe storage is provided under the bench and shelves for boots and other items. The shoe shelves are only 12" deep (instead of the full 16" depth of the shelving unit) to provide a little extra elbow room when seated.
The 2 12" shelves that were installed above the closet rod will be replaced with the 16" deep top shelf, which runs along the entire back wall, and 3 18x16" shelves. This will provide enough storage for the miscellaneous items that wind up in the coat closet because they cant seem to fit in other places. The deeper top shelf will make it easier to store some of the large Rubbermaid totes that are a little too deep for the current closet shelf.
I would have liked to make the shelves adjustable but that would have meant buying a second full sheet of plywood and losing about 3/4" of space for either shelving or hanging which would have been a problem for me.
An upright vacuum cleaner can be stored in the long hanging section or possibly in the corner in front of the double hang section.
The most important change however is the inclusion of a small padded bench. Its a little narrow but big enough to provide a space to sit and take off or put on your shoes.
What Youll Need

Materials
My plan is to use maple for all the lumber. The full sheet of plywood will likely be pre-finished 3/4" maple PureBond.
- (1) 4 x 8 sheet 3/4" Prefinished PureBond Maple plywood
- (1) 2 x 4 sheet of 1/2" in. PureBond Maple Plywood
(for shoe shelves)
- Pre finished maple veneer edgebanding
- (4) 1x4 6 Maple Boards
- (1) 1x2 6Maple Boards
- (1) Knape Vogt 96in Oval Tubing Chrome
- (2) pairs of Knape & Vogt Open Flange For 880 Tube Chrome
- 2" Foam Padding
- Cotton Batting
- Faux Leather Textured Burgundy Fabric
- 3M General Purpose 45 Spray Adhesive
- Staples
- Screws
Tools
- Circular saw and guide or table saw
- Miter saw
- Kreg Pocket Hole Jig
- Jig saw or hand saw
- Drill
- Level
- Pencil
- Tape measure
Cut List
- (1) 66-3/4" x 16" 3/4" Plywood Shelving Side
- (1) 51-1/4" x 16" 3/4" Plywood Top Shelf
- (1) 42" x 16" 3/4" Plywood Double Hang Side
- (1) 17-1/4" x 16" 3/4" Plywood Double Hang Top
- (1) 19" x 10-3/4" 3/4" Plywood Bench Bottom
- (4) 18" x ~15-7/8" 3/4" Plywood Shelves/Shelving Bottom
- (4) 18" x ~11-7/8" 1/2" Plywood Shoe Shelves
- (1) 49-3/4" 1x4 Top Shelf Support
- (1) 34-1/4" 1x4 Seat Wall Support
- (1) 33-1/2" 1x4 Seat Front Support
- (1) 33-1/4" 1x4 Back Wall Support
- (2) 16" 1x4 Top Side Supports
- (1) 15-1/4" 1x4 Double Hang Side Support
- (1) 10-3/4" 1x4 Seat Front Wall Support
- (2) 9-1/4" 1x4 Seat middle Supports
- (4) 11-7/8" 1x2 Shoe Shelf Supports
Cut Plan
3/4" Plywood
The main component will be cut out of 3/4" Plywood. You can save a lot of time if you purchase pre-finished plywood. Youll need to make appropriate changes for your particular closet dimensions.
Two rip cuts will be made to produce two strips 16" wide and what ever is left over will be used for the shelves. The actual dimension will be 16" - (2 * saw kerf).

1/2" Plywood
The shoe shelves dont need to be very strong. 1/2" plywood will be sufficient given the span and weight they will hold. So to save money and space Im using 1/2" plywood for the shoe shelves. Cut in center of 2x4 sheet to make 2 equal sized pieces accounting for saw kerf.

1x4 Boards
The 1x4 boards will be used for the main supports to hold the closet organizer. The can be prefinished whole and then when cut to size the ends sanded and finished in place where exposed.

1x2 Boards
1x2 is used to support the wall end of the shoe shelves.
Step 1: Cut and Finish
Double check the closet dimensions and cut all plywood to size and apply. Apply 3-4 coats of Polycrylic and edgeband where necessary. Some of the boards Ill cut to length and finish with 3-4 coats of Polycrylic. Avoid using oil based finishes because they can out gas for many months and make your clothes smell. Before cutting the boards to length Ill double check the stud locations and make any of the short boards that dont extend the whole wall longer than necessary so that I can attach them into at least 2 studs.
Step 2: Assemble Double Hang Cabinet
The lower section of the double hang can be assembled beforehand and installed in the closet as one unit.
Start by attaching the top, wall and back using pocket hole screws as shown below. The illustration shows the components upside down and backwards for ease of assembly.

Then attach the long side using pocket screws as shown. There are also two pocket holes for screws on the back of the back piece. Youll need to cut a notch on the back of the long side so it can fit around baseboards. (not pictured)

Step 3: Install Double Hang Cabinet
Place the double hang cabinet in the desired location making sure its plumb and level. Attach it to the wall by driving 3 to 3-1/2" wood screws through the back and side components into wall studs.

Step 4: Mark Guide Lines
Determine the high point in the floor if any using a level. From the high point, mark 2 distances on the back wall at 17-1/4" and 80-1/2" up from the floor and draw level lines at the marks.

The bottom line indicates where the top of the bottom supports will be located. The top line indicates where the bottom of the top supports will go. Since we want the top of the top support to be at 84" and were using 1x4s as supports, we subtract 3-1/2" from 84". That way the top of the support will be where we want it but we can see the bottom of the line without having to stand on a latter when installing the top support.
Step 5: Attach 1x4 Supports
Starting with the short pieces, attach the 1x4 supports to the walls by drilling 3 to 3-1/2" wood screws through the face of the 1x4. Use 2 screws to secure to each stud for maximum strength. Do not use drywall screws.

Step 6: Complete Bench Frame
Attach the front and center components of the bench frame using pocket holes as shown. The center supports should be no more than 12" apart.

Step 7: Attach Shelf Bottom To Shelf Side
Cut a notch at the top of the side panel to fit around the 1x4 top shelf support (3/4" x 3-1/2") and drill 2 pocket holes that will be used to attach the side to the top shelf support.

Attach the bottom of the shelving unit to the side using pocket screws as shown.

Step 8: Install the Shelving Unit
Place the shelving unit so it rests on top of the lower supports. Make sure the side support is plumb then attach it with 2 screws through the previously drilled pocket holes into the top support. Drill pilot holes and counter sinks and use 1" to 1-1/4" flat head wood screws to attach the bottom to the bottom support and bench frame.

Step 9: Install Shelves
Start by placing the top shelf on top of the top supports and shelving side. Drill pilot holes and countersinks from the top about every 12" or so using 1 to 1-1/4" wood screws.

Next mark level lines on the side wall where youd like to install your shelves. You can customize the placing how best suits you. 7" spacing is good for most shoes, including high tops and high heels, but you can do more or less depending on your shoe storage needs.

Now install the 1x2 shelf supports on the side wall by screwing them into studs using 3 to 3-1/2" wood screws. Make sure each support is drilled into 2 studs and that they are level back to front. You may need the supports to be longer than the shelves to accomplish this in some situations. The lines you drew previously represent where the tops of the supports should go.

Finally place the shelves in place and secure them by predrilling and countersinking from the top for the side supports and using pocket holes into the side panel as shown.

Step 10: Mount Rod Hardware
Next well need to mount the flanges for the oval closet rod. Two holes need to be drilled for the 5mm pins on the back of the flange. The pins are 32mm apart on center and we need to install the flange so the top-center of the closet rod is about 1.5" down from the shelf above it and 14" away from the back wall. For a normal closet it would be 12" but for a coat closet the extra 2" accounts for coats which tend to be larger.
To accomplish this we need to drill the first hole 2" from the front of the organizer and 1 1/4" down from the top. If you have a Kreg Shelf Pin Drilling Jig and a Kreg 5mm Shelf Pin Jig Drill Bit
 this is very easy to do, Simple position the jig against the front of the panel using the long side and move the jig down 5/8" from the top and drill a hole in the top 2 holes of the jig. You can create a 5/8" spacer to use at all 4 locations.

Place the flanges in the holes and secure with a 1/2" screw. Cut the closet rod to length and place it in the flanges.

Step 11: Make Seat Cushion
The seat cushion is optional but in addition to making the the seat more comfortable it also elevates the seat to a more comfortable height and it discourages people from using the seat as another storage shelf.
The 3/4" plywood bottom of the seat will need to be a little shorter than the width between the wall and the shelving unit to account for the thickness of the fabric covering.
Start by cutting the foam to size. Cutting it about 1/2" wider so it overhangs the front a little will look nicer and be more comfortable. Cut a piece of batting large enough so it overhangs the foam by 1" along the front and sides of the cushion. Use spray adhesive to keep it in place on top of the foam.

Cut the cushion fabric a few inches longer than the batting so that there is enough material to wrap around the foam and plywood. Trim the corners for less bunching at the corners.
Layer the components of the cushion upside down starting with the fabric (good face down), batting and foam (batting down) and finally the plywood bottom. Wrap the fabric neatly around the cushion and staple it to the bottom of the plywood.

Attach the cushion to the frame with pocket holes up from the inside of the seat frame.

Subscribe to:
Posts (Atom)